HDR 101 Such An Incredible Idea
Incredible HDR
When to shoot for HDR:
When you are shooting – mostly landscape – and you have significant or extreme lighting differences between the foreground, middle ground and background. If you are like me, however, almost always when shooting landscape, even vacation photos, where the lighting and time of day may not be particularly ideal.
The technical explanation:
High-dynamic-range imaging is a high dynamic range technique used in imaging and films to reproduce a greater dynamic range of luminosity than what is possible with standard digital imaging or photographic techniques. Standard techniques allow differentiation only within a certain range of brightness. Wikipedia
The K.I.S.S. explanation:
When you take a single shot photo, the camera needs to consider things like a light background and dark foreground, such as a bright sky background when you take a photo of a darker object in the foreground. The opposite could be true as well. With a single shot, it is not always possible get the true view of what your eyes can see. You can certainly do adjustments in a photo editor, but it is simpler and more realistic to use HDR.
While this is key in landscape photography, it could, also apply to other types of photography as well.
How do you use HDR:
Most DSLR cameras allow you to s setting called “Bracket”. Sometimes it is only up to three shots. On higher end cameras you can take five or more bracketed shots. For a three shot HDR landscape you may turn on bracketing and set your camera to shoot 1 shot at normal exposure, 1 shot under exposed and 1 shot over exposed. You would then combine these shots into one, single photograph in Lightroom, Photomatix, Aurora HDR, Lightroom, Photoshop, or any other program for HDR.
It is extremely important to not move the camera for each successive shot. While a good HDR program will try to align the three (or five or more) photos, there are limitations.
What I do is set my camera to take three shots, automatically, with one press of the shutter. If possible I rest my elbows on a solid surface. Ideally, I would use a tripod and remote shutter release, but that is not always practical.
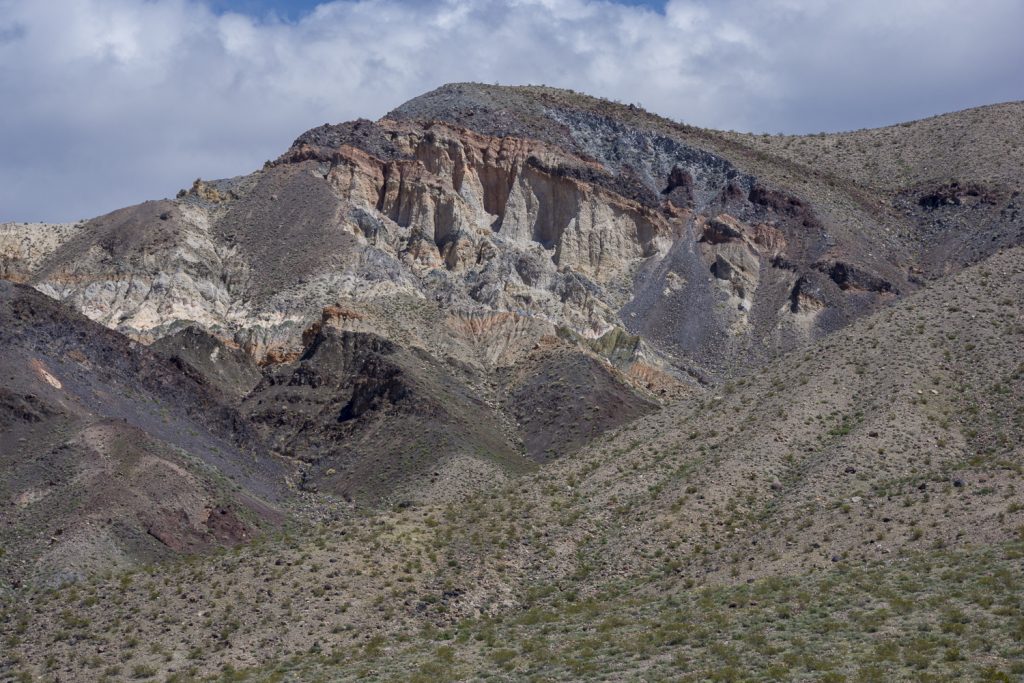
Time for an example:


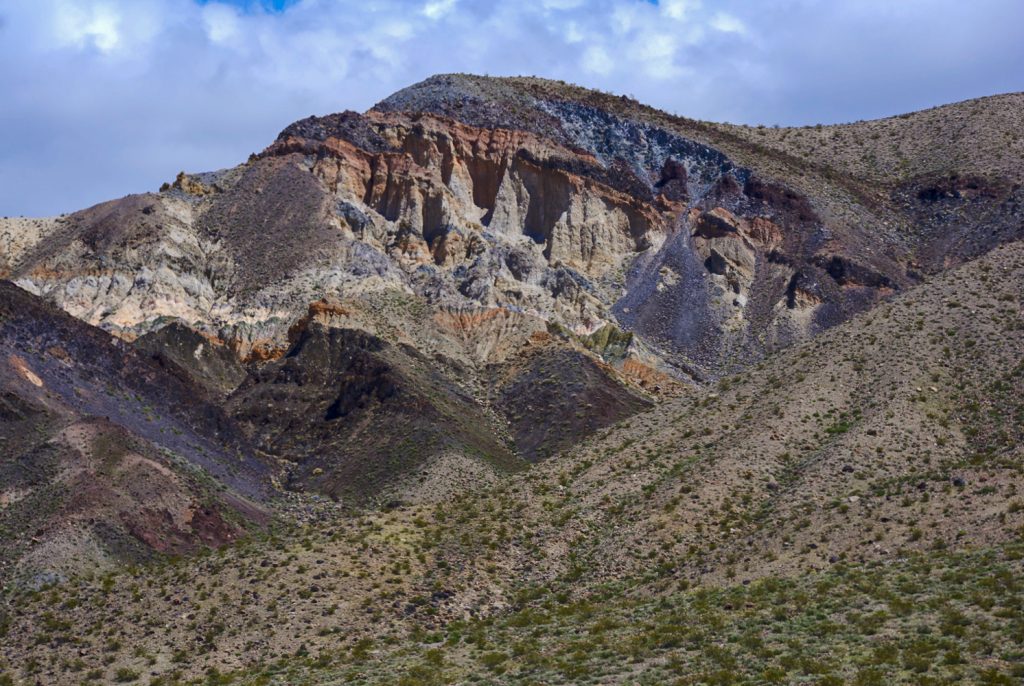
I did, however, actually take three shots, the above, the normal exposure, plus two more, one under exposed and one over exposed.
I then used Photomatix to create a Realistic HDR photo (there are dozens of realistic, artistic and other types of settings in the better HDR programs).
All my landscape photos are HDR.
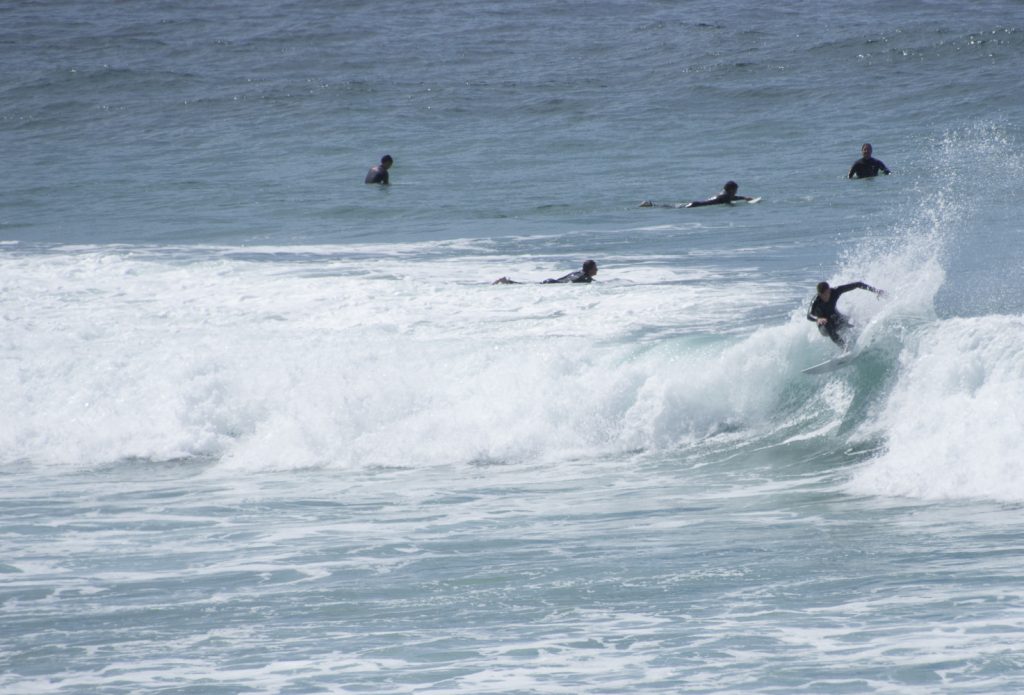
With people and movement, it is almost impossible to take multiple shots with the person in the exact same position and stance.
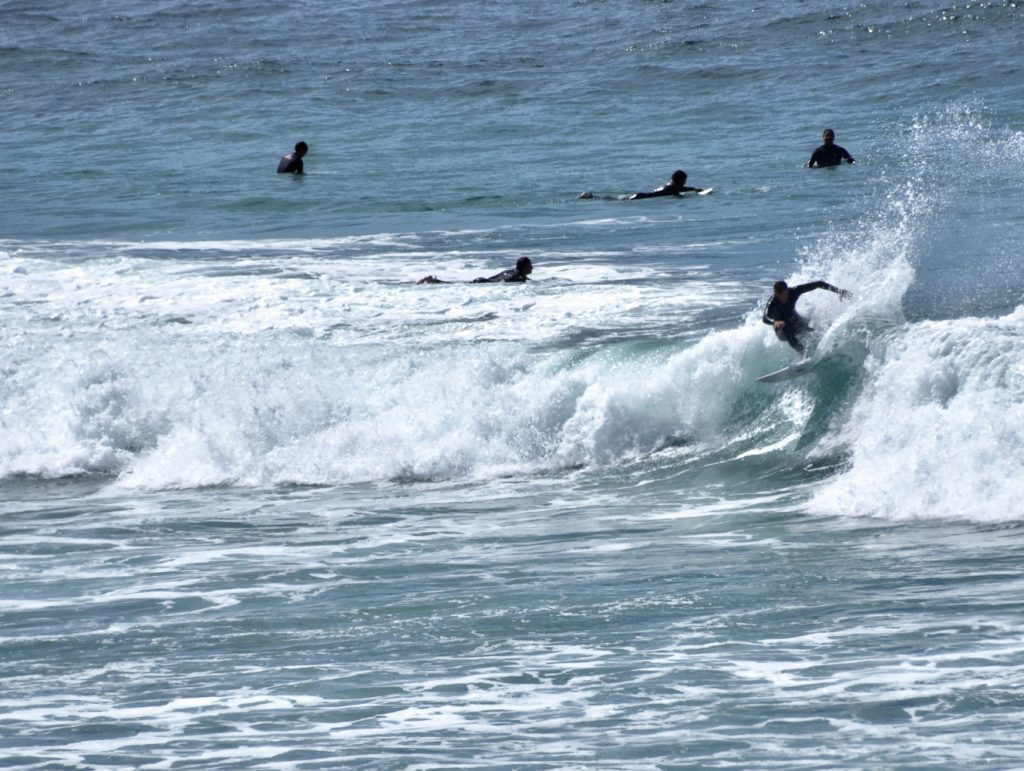
For situations like these, when I have washed out background, I load the single shot into Lightroom and make two virtual copies. One virtual copy I under expose and one I over expose.
Good HRD programs will also do this for you, automatically. Just export the one shot to your HDR program. Creating the virtual copies gives me a better look for each exposure and the ability to micor adjust.
I then create an HDR image from the image below.
CAUTION: It is quite easy, in HDR, to overdue the desired result, giving your photo a distinct HDR look. If that is the goal, fine. Most of time, however, my goal is to bring the dark and washed out pieces closer to what the eye would see, and keep the photo as natural looking as possible.
More detailed discussion about HDR for nature photography
Glenn Abelson
Comments are welcome, below.

